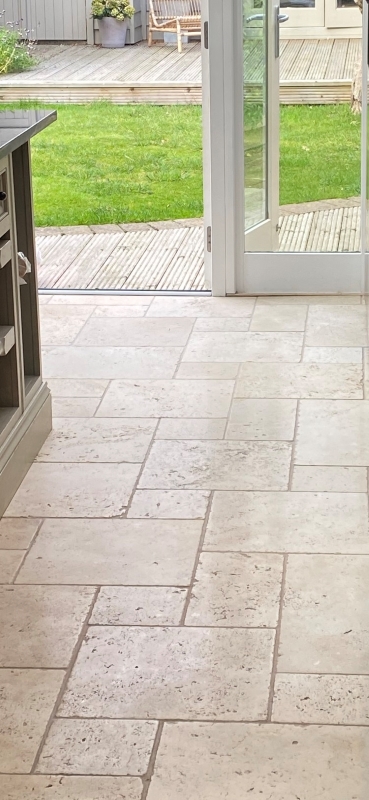
Essex

Travertine Kitchen Floor Renovation Billericay

Travertine Kitchen Diner Floor Tile and Grout Renovated in Billericay

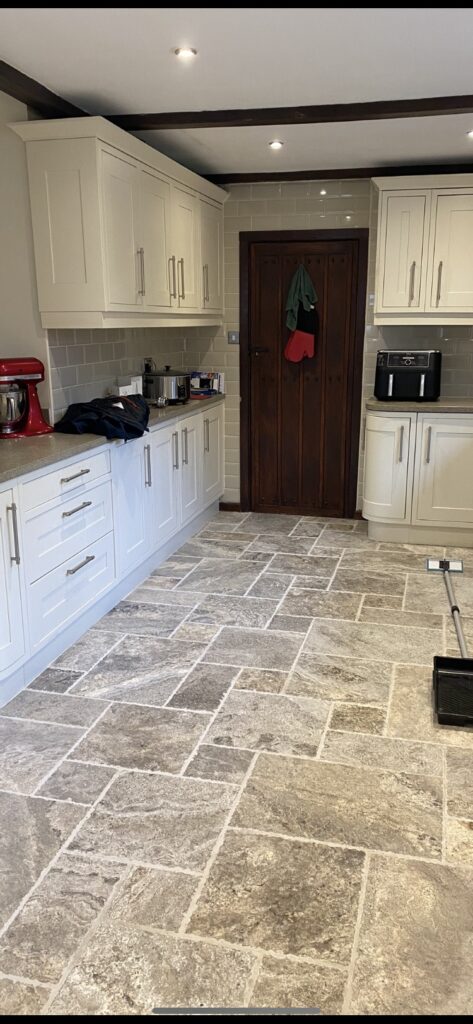
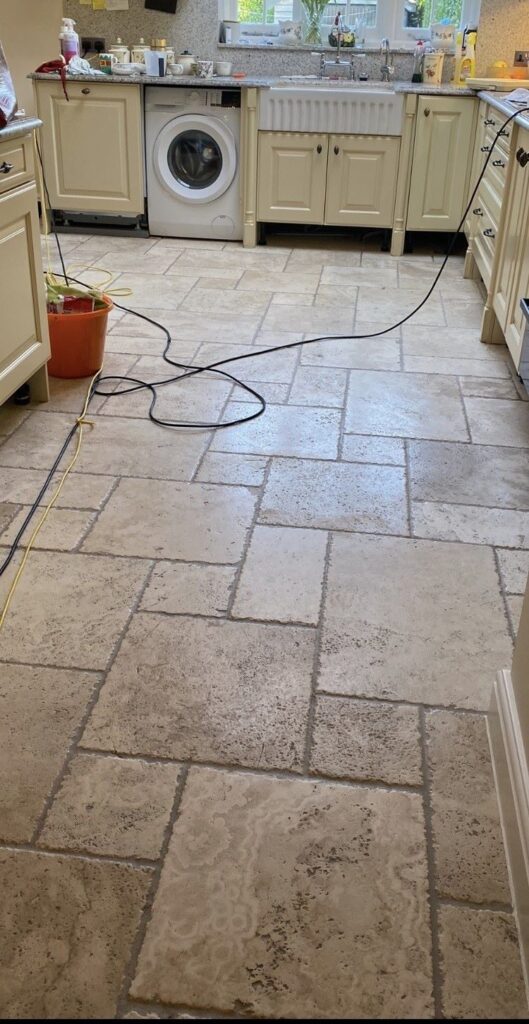
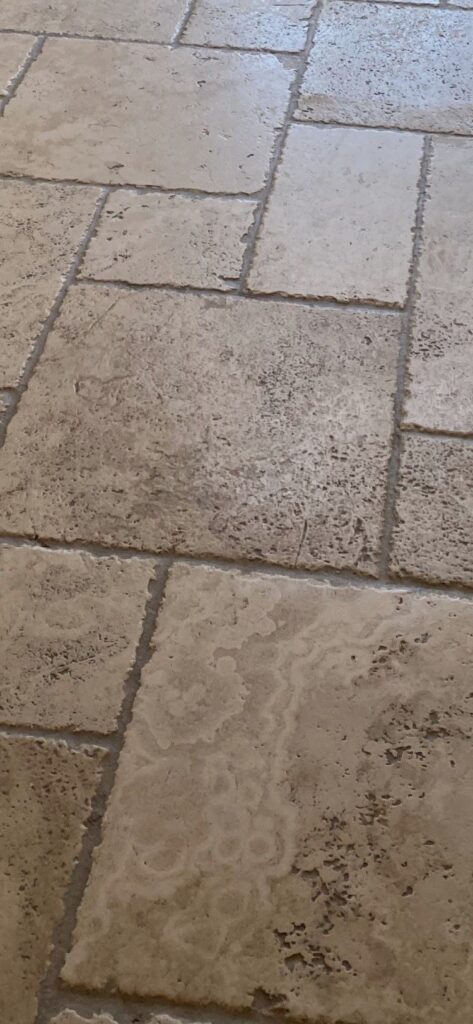
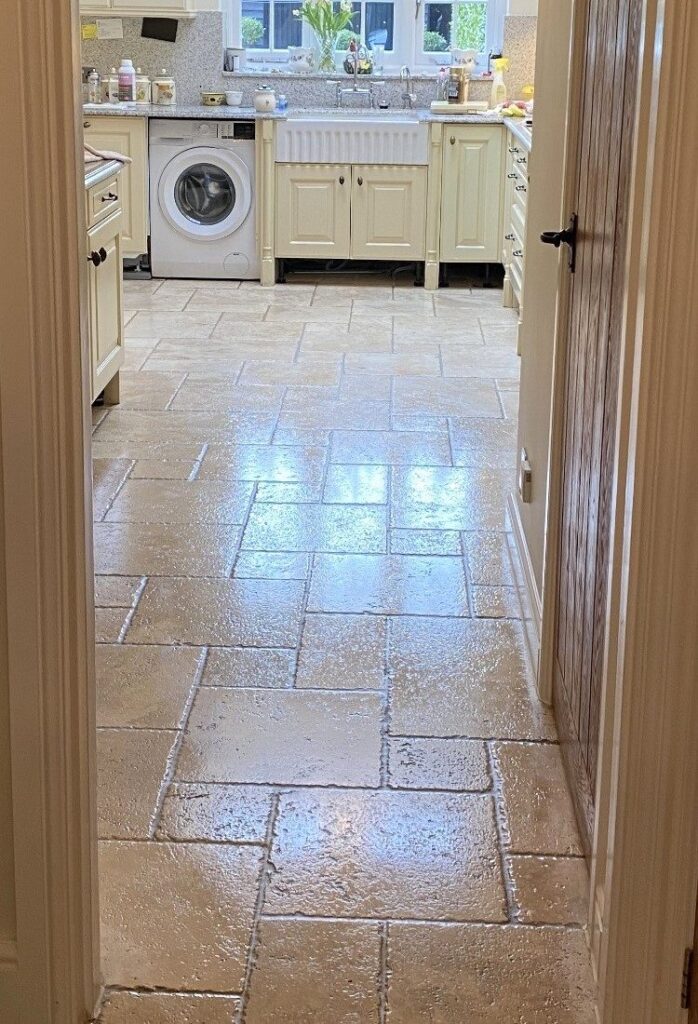
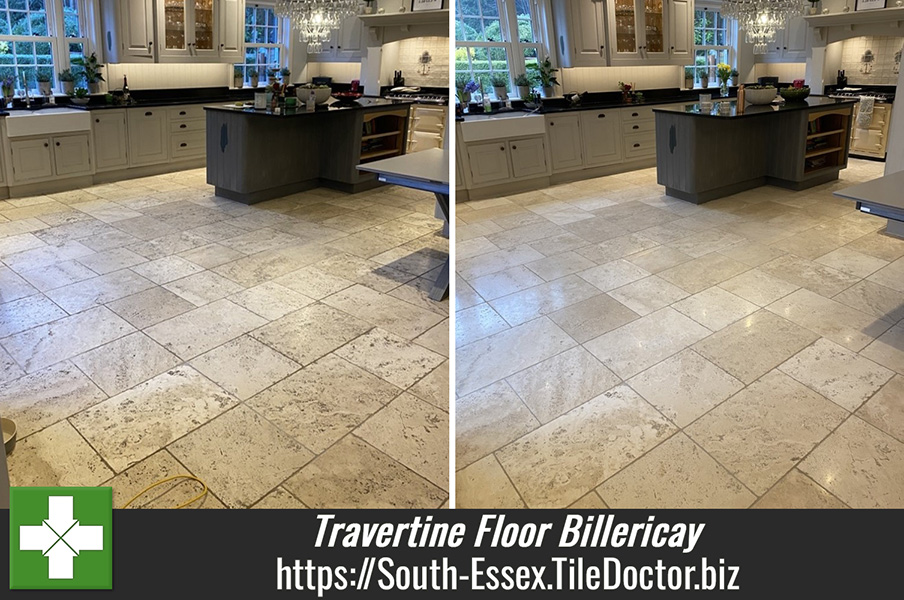
Earlier this year I was asked to visit a property in Billericay near Basildon to quote for renovating an extensive Travertine tiled floor. The Travertine floor has been laid 15 years prior in the large Kitchen, Utility and adjacent dining room and has not been maintained correctly leaving it vulnerable to ingrained dirt.

Travertine Kitchen Diner Floor Before Renovation Billericay

Natural stone floors look fantastic when first laid but will only remain so if the sealer is maintained. Natural stone and especially Travertine is porous and the sealer will prevent dirt from becoming ingrained in the stone keeping it on the surface where it’s easy to clean away. In this case the sealer had long since worn off and the Travertine was absorbing dirt leaving it looking permanently dirty despite cleaning.

After discussing the problems with the owner, I recommended deep cleaning the Travertine and Grout with an abrasive pad and alkaline cleaner and then sealing to protect the stone going forward. I worked out a plan for its renovation and provided them with a quote which was accepted and a date scheduled.

Deep Cleaning Travertine Tile and Grout

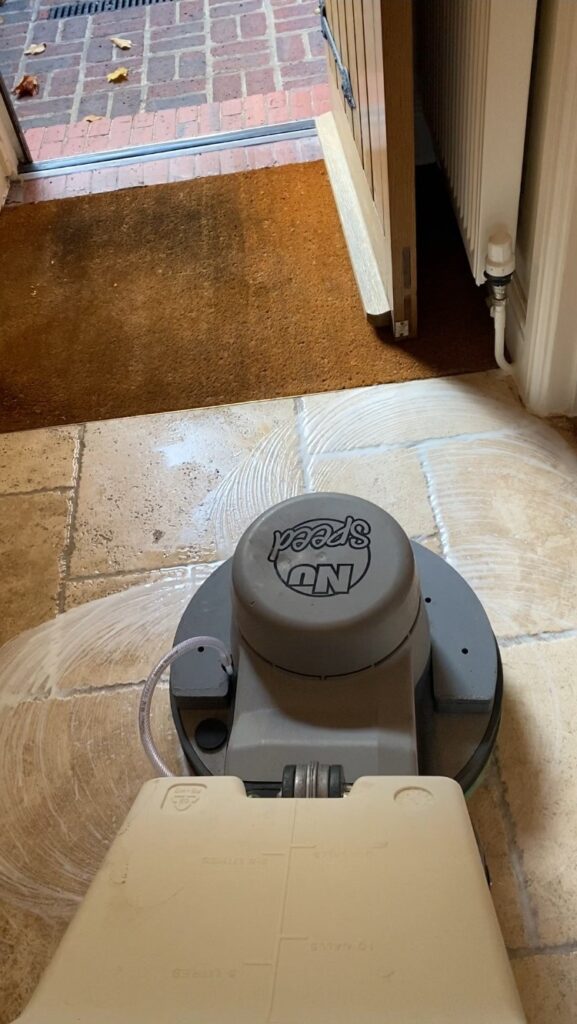
To deep clean the stone and grout it was sprayed with a 1:4 dilution of Tile Doctor Pro-Clean which was then let to soak into the floor for a good ten to fifteen minutes. This gives the Pro-Clean time to breakdown and digest the soils and any remaining old sealer. Next the floor was scrubbed with rotary machine fitted with a Black Pad to release the dirt from the floor into the solution where it could be extracted with a wet vacuum.

Pads can struggle to reach into the recesses of the grout line so this was also hand scrubbed using a pollybrush and more Pro-Clean to get it as clean as possible. This process sounds straightforward but it was a large floor with several sections to complete so it took all the first day to complete.

Before finishing for the day, the floor was inspected and any stubborn marks spot cleaned until I was happy with the whole floor. The floor was then rinsed with water to remove any remnants and then dried with the wet vacuum.

Sealing a Travertine Tiled Floor in Billericay

I returned the next day and started by checking the floor was dry using a damp meter. The readings were fine so the first coat of what would be two coats of Tile Doctor Ultra-Seal was applied. This sealer doesn’t contain any colour enhancer so it leaves the stone with invisible hardwearing protection and a very natural look. The sealer ensures dirt can’t penetrate the pores of the stone thereby keeping it on the surface where it can be easily cleaned away.

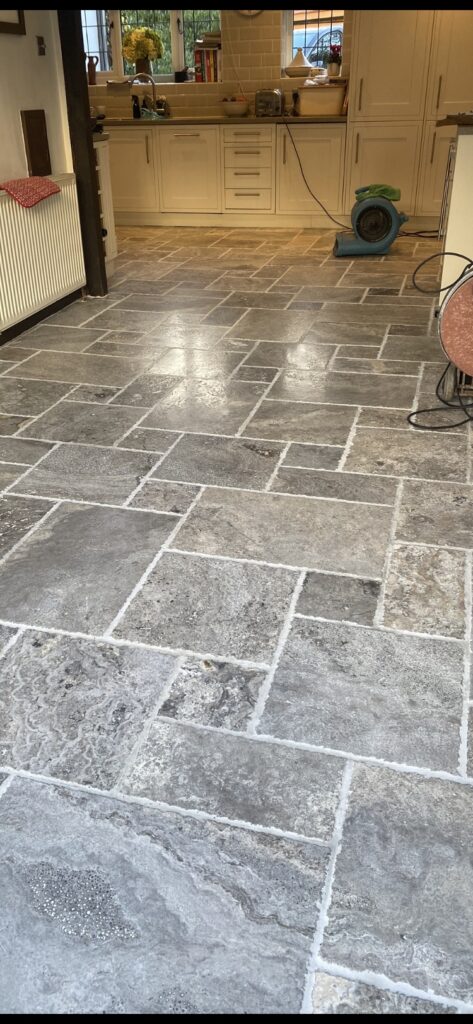
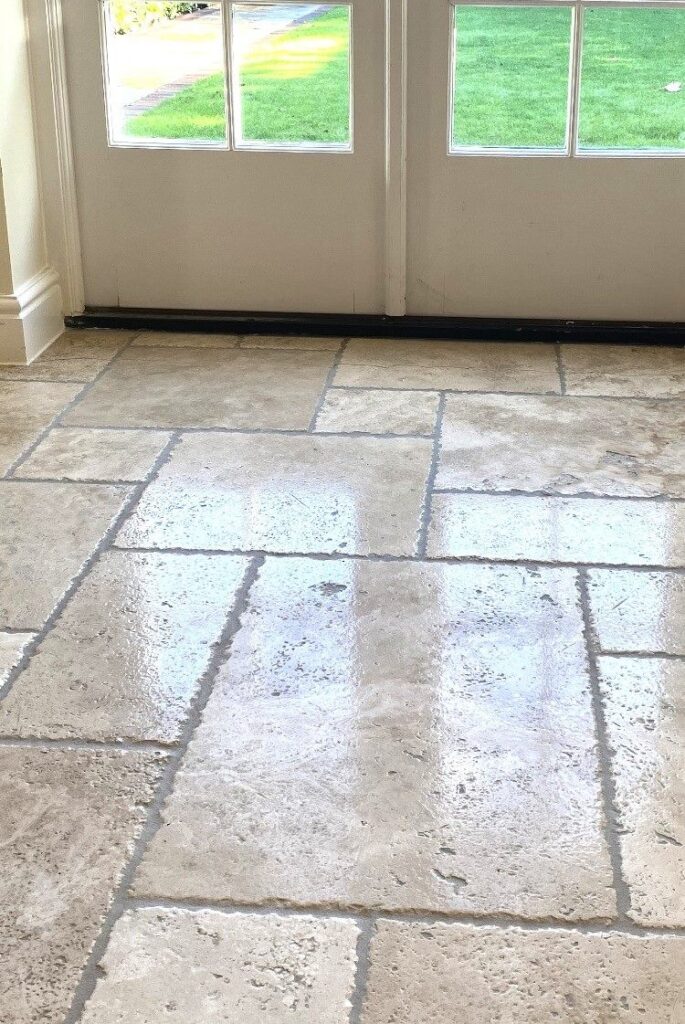
Travertine Kitchen Diner Floor After Renovation Billericay

The transformation was quite dramatic and the customer was very pleased and shocked at how it had changed. Regarding regular cleaning, I recommended using Tile Doctor Neutral Tile Cleaner which is a pH neutral cleaner. It won’t strip the sealer like the previous products they had been using and should ensure the floor is kept in this condition for many years to come.


Professional Renovation of a Travertine Tile and Grout in South Essex

Travertine Kitchen Diner Floor Tile and Grout Renovated in Billericay Read More »

Edwardian Quarry Tiled Hallway Floor Refurb Leigh-on-Sea

Edwardian Quarry Tiled Hallway Floor Refurb in Leigh-on-Sea

We were asked to help this homeowner in Leigh-on-Sea refurbish their original Edwardian Quarry tiled floor following a spot of decorating. The floor had been well maintained, and some parts of the floor were still being protected by an old sealer.

Edwardian Quarry Tiled Hallway Floor Before Cleaning Leigh-on-Sea

I visited the property to carry out a survey and confirmed that the sealer however was worn down on the busier areas of the floor. This has resulted in the Quarry tiles becoming ingrained with dirt and that combined with the paint splashes meant it was time for a deep clean and fresh sealer.

I worked out a detailed quote later that day and emailed it over to the owner who replied confirming they would like to go ahead and provided several dates which would work for them.

Cleaning an Edwardian Quarry Tiled Hallway

To deep clean the floor, it would be necessary to remove all the sealer from the tiles, otherwise adding more sealer would result in inconsistent layers of sealer on different parts of the floor and a patchy result. The first step therefore was to strip the tiles of all sealer and dirt using Tile Doctor Remove & Go which is a coatings remover. This was applied to the floor, left to soak in for ten minutes and then scrubbed in using a black buffing pad fitted to a rotary machine running at a slow 150 rpm.

This action removed the old sealer and pulled dirt from the pores of the Quarry tile into the cleaning solution where it darkened the solution. The soiling was then rinsed away with water and extracted with a wet vacuum.

When the floor dried it was showing some signs of efflorescence, so it was treated to an acid wash with the application of Tile Doctor Acid Gel. The acidic nature of the gel dissolves efflorescent salts and further cleans the tiles, it also neutralises the pH level of the tiles after the use of Tile Doctor Remove & Go which is a strong alkaline.

The cleaning finished with another rinse and extraction and the wet vacuum used extensively to remove as much moisture from the floor as possible. Once done the tiles were left to dry off fully overnight.

Edwardian Quarry Tiled Hallway Floor During Cleaning Leigh-on-Sea

Sealing an Edwardian Quarry Tiled Hallway

Work continued the following day checking first that the tiles had dried using a damp meter. The results were within tolerance, so a coat of Tile Doctor Colour Grow sealer was applied to the tiles and left to dry; this is an impregnating matt sealer that improves colour. When dry this was followed by three coats of Tile Doctor Seal & Go which adds a nice satin sheen to the tiles and left a very appealing and attractive finish.

The results speak for themselves, and my client was very happy and left the following five-star feedback:

“Matthew was totally reliable from first contact. The floor cleaning and sealing has surpassed our expectations and looks amazing. He is so professional and a perfectionist. Thank you. By Joanna T, Leigh-on-sea”

Edwardian Quarry Tiled Hallway Floor After Renovation Leigh-on-Sea

For the aftercare cleaning of sealed Quarry tiles, I recommend the use of Tile Doctor Neutral Tile Cleaner which is a ph neutral tile and grout cleaner that won’t affect the sealer.

Edwardian Quarry Tiled Hallway Floor After Renovation Leigh-on-Sea


Professional Renovation of an Edwardian Quarry Tiled Hallway in South Essex

Edwardian Quarry Tiled Hallway Floor Refurb in Leigh-on-Sea Read More »
Marble Tiled Floor Polishing Brentwood

Polish Restored to a Large Marble Tiled floor in Brentwood

The photographs below are of a very impressive and beautiful Marble tiled floor at a substantial property in Brentwood. The client had two big dogs, and it had been a while since the floor was last professionally maintained. The owner called me in to give the marble a deep clean, seal and re-grout in some areas. Happy to help I arranged an appointment to call in and survey the floor.

Marble Tiled Floor Before Polishing Brentwood

The marble tiles were as I suspected, the sealer had started to wear down in the high traffic areas and now dirt was getting ingrained in the stone, it had also lost its polished appearance in some areas. The ground floor measured approximately 80 to 90m2 and ran into the orangery, kitchen, utility, WC and hallway so it was a large job. From the visit I was able to work out a detailed quotation which was accepted and a date set for the work to start.

Marble Tiled Floor Before Cleaning Brentwood

Cleaning and Polishing a Marble Tiled Ground Floor

Work started with the grouting which involved raking out the areas of loose grout and replacing with new. Whilst this was setting I moved onto cleaning other sections of the marble flooring using a set of Tile Doctor Burnishing Pads which are run over the tiles in sequence from coarse to extra fine.

The coarse 400-grit pad opens the pores in the stone and flushes out ingrained dirt and residues. Water is used to lubricate the process, and this turns into a dark slurry as the work progresses. Once each tile has been burnished several times with the coarse pad, the floor was rinsed with more water and the slurry extracted with a wet vacuum.

The coarse pad is then swapped for the 800-grit pad which is the first of three finer pads that gradually close the pores in the stone and rebuild the deep polish. Again, these are applied with water and the floor rinsed and extracted afterwards to remove the slurry.

Next step was to deep clean the grout lines using Tile Doctor Pro-Clean diluted with 4 parts water and scrubbed in using a stiff grout brush. The pads also help clean the grout but can struggle to reach into the recesses of the grout line, so I find doing this step by hand is the most effective way to get the grout clean.

After another rinse and extraction to remove soiling from the grout cleaning work we moved onto the final step in the stone polishing process by applying the very fine 3500-grit burnishing pad. This pad is applied dry with only a little water using a process we call a spray burnish leaving the marble smooth with a deep light-reflecting finish.

Marble Tiled Floor During Cleaning Brentwood

Sealing a Marble Tiled Ground Floor

The floor had underfloor heating which really helped the drying process, and I was able to finish the floor with the application of two coats of sealer. The client wanted a natural finish, so Tile Doctor Ultra-Seal was used for this as it doesn’t change the appearance of the stone. This is an impregnating sealer that penetrates deep into the stone protecting it from within and ensuring dirt remains on the surface where it can be easily cleaned away.

Marble Tiled Floor After Polishing Brentwood

Once complete the Marble had a consistent deep mirror finish which my client was delighted with and left the following five-star feedback which is always appreciated:

“We could not be happier with the meticulous job Matthew carried out refurbishing our hallway, kitchen and conservatory marble floors. They all look better than when they were first laid! We would without hesitation recommend Matthew, you will not be disappointed.”

For aftercare I recommended Tile Doctor Stone Soap which is a gentle yet effective cleaning product that contains a patina enhancer and won’t impact the sealer.

Marble Tiled Floor After Polishing Brentwood


Professional Renovation of a Large Marble Tiled Floor in Essex

Polish Restored to a Large Marble Tiled floor in Brentwood Read More »
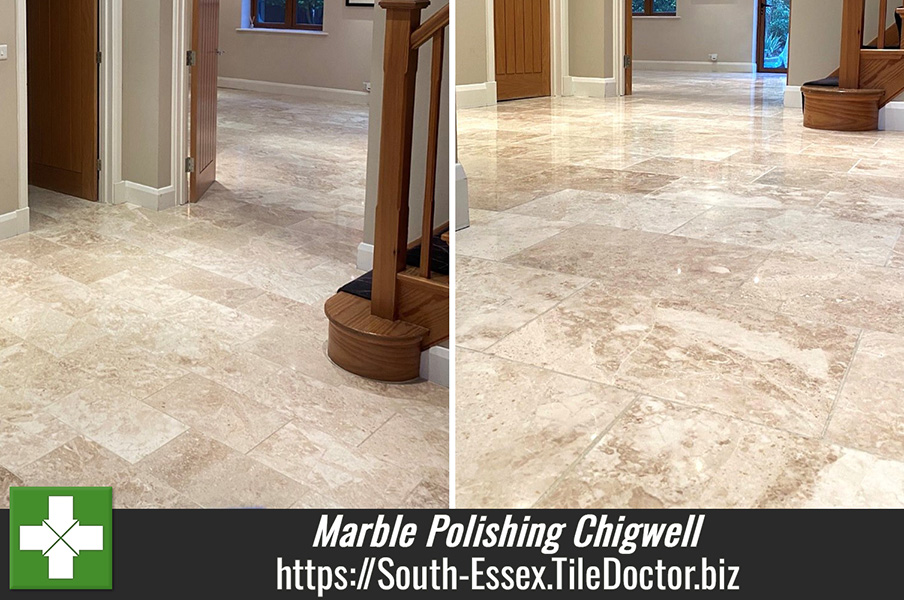
Marble Floor Cleaning Polishing and Sealing Chigwell

Sparkle Returned to Dull Marble Floor in Chigwell Essex

This premium Marble Tiled floor was installed at a property in Chigwell around fifteen years ago and had only ever been mopped clean, never polished. The floor had long since lost its sparkle and the owner wanted to know if anything could be done to bring back the deep shine it once had.

Marble Floor Before Cleaning Chigwell Marble Floor Before Cleaning Chigwell

Polished stone floors like this example will become dull with use if the polish isn’t maintained so it’s quite a common issue. The solution is to maintain the polished appearance using a very fine burnishing pad which is encrusted with diamonds that hone the stone and return the deep polish. We do offer this as a maintenance service however in this case the sealer had also worn off and so it would be necessary to deep clean the Marble first, rebuild the polish and then re-seal.

Having visited the property to understand all the issues and measure up I was able to email over a detailed quotation for completing the work and products needed. Happy with the quote and keen to have the Sparkle restored the quote was accepted and a date set for the work to start which would take two days.

Deep Cleaning Polished Marble Flooring

To restore the deep polish and deep clean the stone a series of Tile Doctor Diamond Burnishing Pads were run over the tiles in sequence from coarse to extra fine. The coarse 400-grit pad opens up the pores in the stone and flushes out ingrained dirt and residues. Water is used to lubricate the process, and this turns into a dark slurry as the work progresses. Once each tile has been burnished several times with the coarse pad, the floor is rinsed with more water and the slurry extracted with a wet vacuum.

The coarse pad is then swapped for the 800-grit pad which is the first of three finer pads that gradually close the pores in the stone and rebuild the deep polish. Again, these are applied with water and the floor rinsed and extracted afterwards to remove the slurry.

Next step was to deep clean the grout lines using Tile Doctor Pro-Clean diluted with 4 parts water and scrubbed in using a stiff grout brush. The pads also help clean the grout but can struggle to reach into the recesses of the grout line so I find doing this step by hand is the most effective way to get the grout clean.

After another rinse and extraction to remove soiling from the grout cleaning work moved onto the final step in the stone polishing process by applying the very fine 3500-grit burnishing pad. This pad is applied dry with only a little water using a process we call a spray burnish leaving the marble smooth with a deep light-reflecting finish.

Sealing a Marble Tiled Kitchen

The floor was left to fully dry out overnight and on the second day the marble was finished with the application of Tile Doctor Colour Grow sealer. This is Tile Doctor’s impregnating colour enhancing sealer that penetrates deep into the stone protecting it from within. The sealer brings out the colour in the stone whilst adding long-lasting protection from spills, stains, and moisture.

Marble Floor After Cleaning Polishing and Sealing Chigwell Marble Floor After Cleaning Polishing and Sealing Chigwell

Once complete the Marble and Grout looked so much cleaner and I’m pleased to say the sparkle had returned. The floor now looked like a new installation again and my customer was very happy with the transformation.

For aftercare I recommended Tile Doctor Stone Soap which is a gentle yet effective cleaning product that contains a patina enhancer and won’t impact the sealer.


Professional Restoration of a Marble Tiled Kitchen in South Essex

Sparkle Returned to Dull Marble Floor in Chigwell Essex Read More »
Silver Travertine Floor Renovation Shenfield

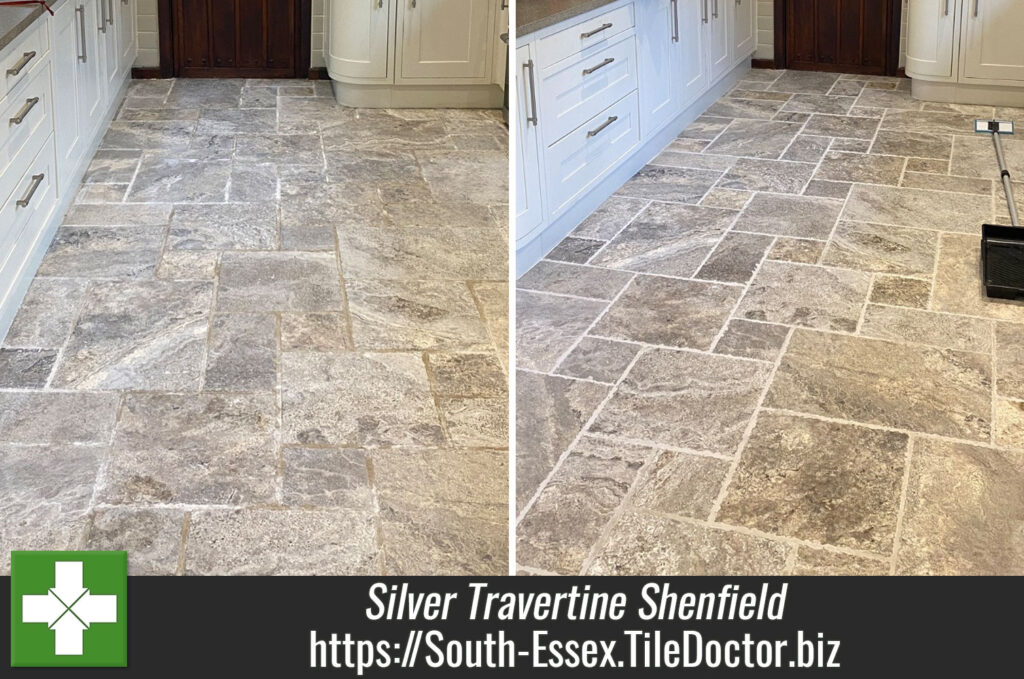
Renovating a Silver Travertine Kitchen Floor in Shenfield Brentwood

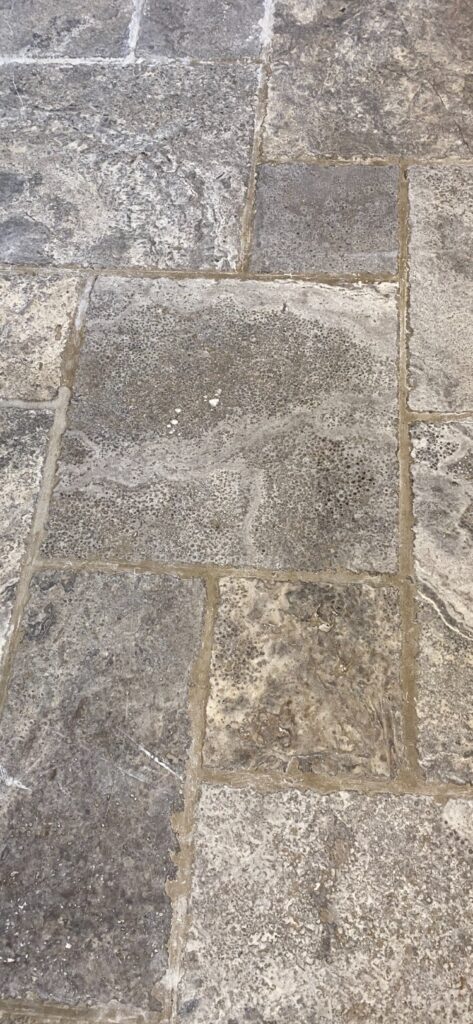
The tiles in the pictures below are Silver Travertine located in the Kitchen of a client in Shenfield which is an affluent suburb of Brentwood. Silver Travertine rich blend of Silver and Grey and displays lots of character when maintained. In this case the floor hadn’t been cleaned and sealed in some years and the previous sealer had now worn down leaving it vulnerable to ingrained dirt and resulting in a dull appearance.

Unhappy with how the floor now looked I was asked to quote for renovating it. The owner was struggling to keep it clean and wanted it cleaning and re-sealing, additionally the grout was stained in places and needed attention.

Silver Travertine Floor Before Cleaning Shenfield Silver Travertine Floor Before Cleaning Shenfield

I called in to survey the floor and was able to see for myself the problems they were facing. I worked out a plan for renovating the stone and grout and discussed what sort of finish they wanted for the floor which would affect the choice of sealer.

The renovation plan led to the creation of a quote which was accepted and a date scheduled for the work to start.

Cleaning a Silver Travertine Tiled Kitchen Floor

On arrival I applied a 1:3 dilution of Tile Doctor Pro-Clean which was left to dwell for thirty minutes so it could soak into the pores and break down the dirt, grease, and any remaining sealer. The floor was then scrubbed with a rotary buffing machine fitted with a coarse 400-grit burnishing pad to get the stone clean and free of sealer.

The grout was then hand scrubbed to get it clean as possible; the pads do clean the grout but can struggle to reach into the recesses of the grout line, so I always find following up by hand gets the best result. The slurry was then vacuumed off the floor using a wet vacuum and then rinsed with water and vacuumed again.

Next step was to apply the next burnishing pad in the series which is a medium 800-grit. This is the first step in the polishing process which improves the appearance of the Travertine and adds a pleasing shine to the tile. The pad is run over each tile several times using only water to help lubricate. Once done the floor is rinsed and extracted with the wet vacuum as before. This polishing process was then repeated using a fine 1500-grit.

After another rinse and extraction to the floor was left to dry off overnight with a turbo dryer left in place for several hours to speed things up.

Sealing a Silver Travertine Tiled Kitchen Floor

Returning the next day, I completed the polishing of the Travertine using a very fine 3000-grit burnishing pad which is run over the floor dry using a little water sprayed onto each tile as you progress. This left the Travertine with a lovely subtle shine; it also leaves the floor dry and ready for sealing.

To get the best from Silver Travertine we had chosen to seal the floor using Tile Doctor Colour Grow which is an impregnating sealer that contains a colour enhancing formula. Two coats were applied leaving around thirty minutes drying time between each coat. Tile Doctor Colour Grow is an impregnating sealer that enhances and improves the colour and texture of natural travertine whilst providing durable protection.

Silver Travertine Floor After Grout Cleaning Shenfield

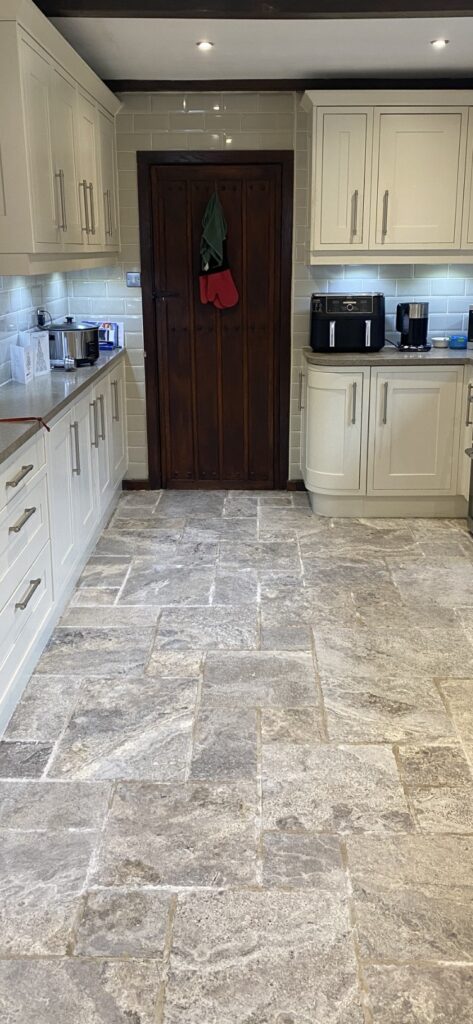
My client was very happy with the improvement in the appearance of the floor, and I think you will agree the Travertine and Grout looks so much cleaner and inviting.

Silver Travertine Floor After Renovation Shenfield

Before leaving I took time to discuss aftercare and recommended the client to use Tile Doctor Stone Soap as a maintenance cleaner.


Professional Restoration of a Silver Travertine Tiled Kitchen in Essex

Renovating a Silver Travertine Kitchen Floor in Shenfield Brentwood Read More »
Travertine Kitchen Floor Renovation Chelmsford Essex

Travertine Tiled Kitchen Floor Renovated in Chelmsford

Earlier this year I paid a visit to a client in Chelmsford who had a large that needed attention. The floor had been installed twelve years ago when a extension was added to the rear of the house.

Travertine Kitchen Floor Before Cleaning Chelmsford

Discussing the floor on the phone my client had said that the floor always seemed dirty and was proving hard to keep clean. This to me is a sign that the protective sealer that keeps dirt on the surface of the tile had failed. It is important to maintain the sealer on a stone floor as without it the dirt becomes ingrained in the pores of the tile where it is difficult to shift. With stone floors like Travertine, I always recommend our annual maintenance program to ensure the floor keeps looking its best.

I paid a visit to the property to survey the large floor and came up with a renovation plan that would deep clean the floor, remove the ingrained dirt from the tile and grout and then re-seal. Keen to improve the appearance of the floor my quote was accepted, and a date set for the work to start.

Cleaning a Travertine Tiled Kitchen

To remove what was left of the original sealer and get the tiles clean I applied a strong dilution of Tile Doctor Remove and Go and left it to soak in for ten minutes. Then the floor was scrubbed using a rotary buffer machine fitted with a Black pad running at a slow 150 rpm. The black pad was then changed to a poly brush which would be better at cleaning into the recesses of the grout lines. The floor was then rinsed with water and the soiling extracted with a wet vacuum.

Travertine Kitchen Floor During Cleaning Chelmsford

Once clean I was able to inspect the floor and spot clean any stubborn areas. With the cleaning finished the floor was given a final rinse and then dried as much as possible with the wet vacuum. The floor was then left to dry off overnight.

Sealing a Travertine Tiled Kitchen

I returned the next day and checked the floor was dry using a damp meter. I always like to do this as applying sealer to a damp floor can result in a patchy result. The moisture readings were fine, so I went ahead and sealed the floor with two coats of Tile Doctor Colour Grow sealer.

This is a colour enhancing impregnator that works by soaking into the pores of the stone, improving colour and preventing dirt from residing there. Tile Doctor Colour Grow is ideal for characterful tiles like travertine as it helps bring out the brown shades in the stone. It certainly did the trick on this floor and helped bring out its character.

Travertine Kitchen Floor After Cleaning Sealing Chelmsford Travertine Kitchen Floor After Cleaning Sealing Chelmsford

For aftercare cleaning I recommended Tile Doctor Neutral Tile Cleaner which is a gentle yet effective tile and grout cleaner that won’t impact the sealer. This is important as many of the tile cleaning products you find in supermarkets are simply too strong for use on a sealed floor and will quickly degrade the sealer.


Professional Cleaning of a Travertine Tiled Kitchen in Essex

Travertine Tiled Kitchen Floor Renovated in Chelmsford Read More »
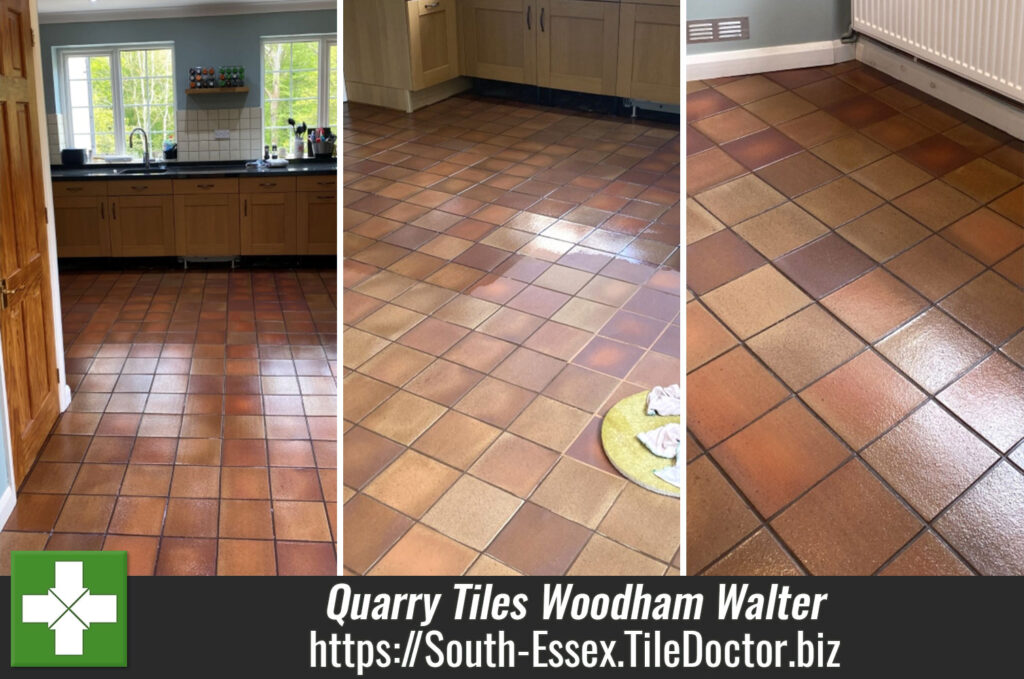
Quarry Tiled Kitchen Floor Renovation Woodham Walter

Quarry Tiled Kitchen Floor Deep Cleaned and Satin Sealed in Woodham Walter

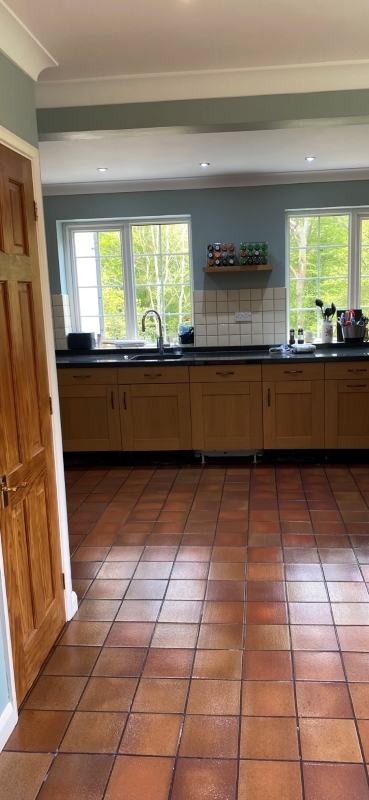
The photos are of a large Quarry tiled Kitchen floor at a property in Woodham Walter which is a small village between Danbury and Maldon. The floor had been installed 20 years ago by the current owners and although in reasonable condition they felt it was time to have them renovated as the tiles had lost their sheen and now looked flat and unattractive.

Quarry Tiled Kitchen Floor Before Cleaning Woodham Walter Maldon

I went over to survey the floor and quote for deep cleaning and then re-sealing. The photographs don’t really show it, but it was clear to me that the sealer had worn off and it was the sealer that had brought the depth and colour to the quarry tiles.

We discussed the process which would take two days and decided on a sealer that would best match their expectations. They were happy with my quote and the work was booked in.

Cleaning a Quarry Tiled Kitchen Floor

On arrival I set about prepping the floor for cleaning which for this floor primarily meant removing the kick boards from underneath the kitchen units.

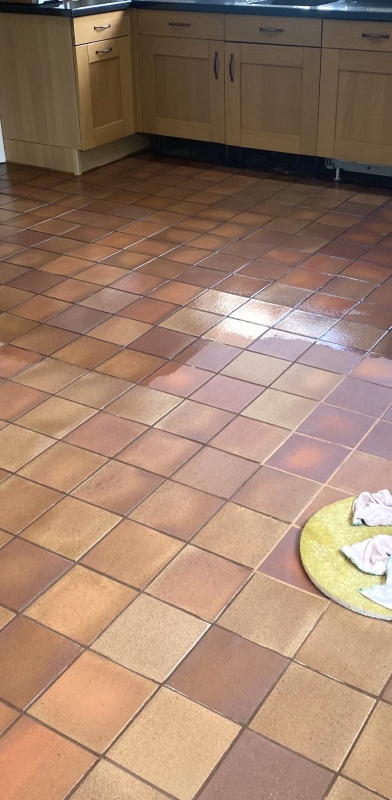
Working in sections I set about cleaning the quarry tiles using Tile Doctor Remove and Go. This as the name of the product suggests is a coatings remover that cleans the floor and removes any sealer left on the tiles. Although it had been some time since it was last sealed its important that all the previous sealer is removed before applying a new sealer. This ensures you don’t end up with different levels of sealer and some areas appearing darker than others.

The Remove and Go was left to soak in for ten minutes before being worked in with a rotary buffing machine fitted with a black scrubbing pad. The grout was also scrubbed into the grout lines by hand using more solution and a stiff brush. This action lifts the dirt out of the floor and turns the cleaning solution and old sealer into a slurry, this is then rinsed off with water and extracted with a wet vacuum.

Next, I treated the tiles to an acid rinse using a 1:5 dilution of Tile Doctor Grout Clean-up. This further cleans the tiles and will neutralise the pH level of the floor following the use of Tile Doctor Remove and Go earlier which is a strong alkaline. The acidic nature of the product microscopically etches the tiles to ensure a stronger bond with the sealer.

The Grout Clean-up was brushed into the floor and then rinsed off with more water before being extracted with the wet vacuum. After another rinse with water the wet vacuum was then utilised to get the floor as dry as possible before leaving it to dry off fully overnight.

Sealing a Quarry Tiled Kitchen and Dining Room

The next day the moisture level of the Quarry tiles was checked using a damp meter to ensure the floor was dry enough for sealing. This is always worth doing as applying sealer to a damp floor can result in a patch appearance.

Quarry Tiled Kitchen Floor During Sealing Woodham Walter Maldon

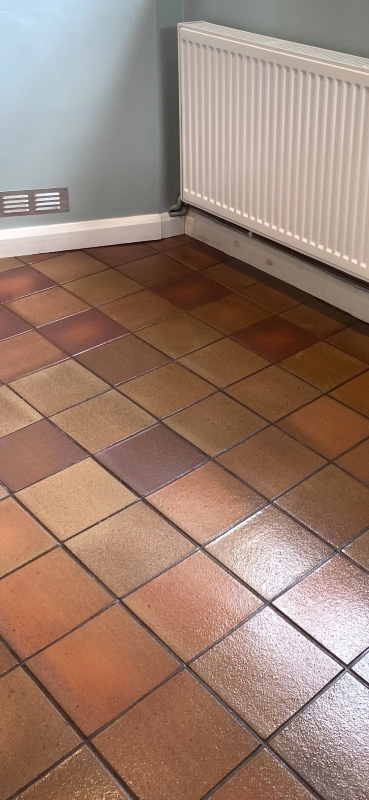
The moisture readings were fine and so work started on sealing the tiles using Tile Doctor Seal & Go which works really well on Quarry tiles and results in a warm satin sheen finish. This product is also water based so you don’t get that solvent smell being given off as it dries.

Quarry Tiled Kitchen Floor After Cleaning Sealing Woodham Walter Maldon

Sealers work by keeping the dirt on the surface of the tile where it can be easily cleaned away and on the subject of aftercare cleaning I recommended the use of Tile Doctor Neutral Tile Cleaner. It’s important to use a neutral tile cleaner on sealed floors like this as stronger bleach-based products will wear the sealer off prematurely.

Professional Restoration of a Quarry Tiled Kitchen and Dining Room in Essex

Quarry Tiled Kitchen Floor Deep Cleaned and Satin Sealed in Woodham Walter Read More »
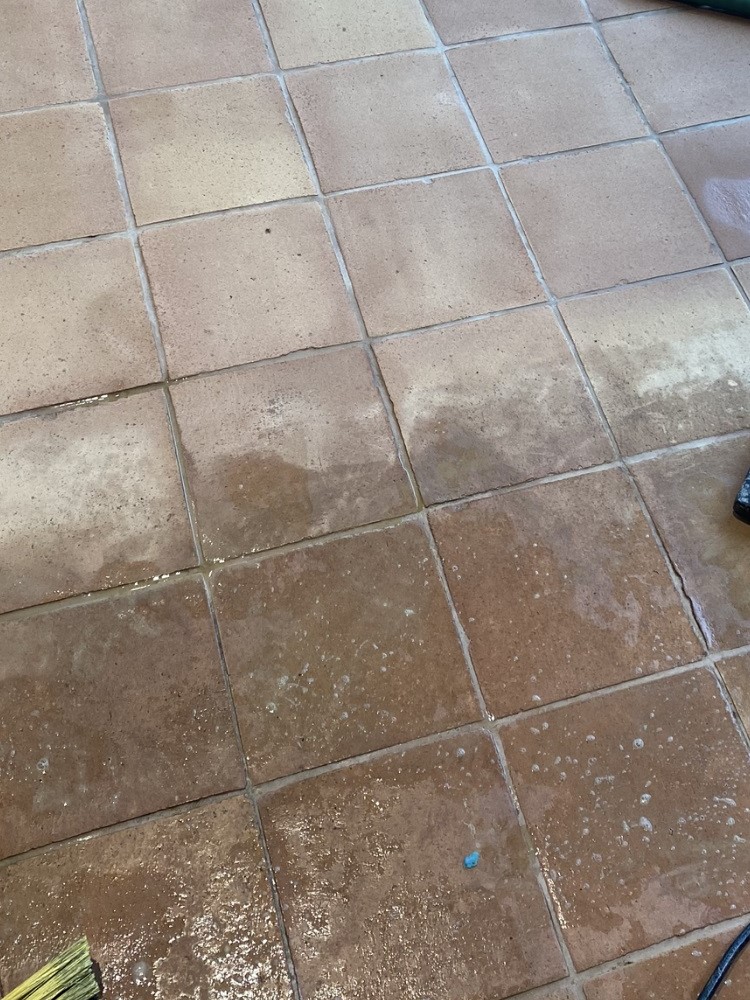
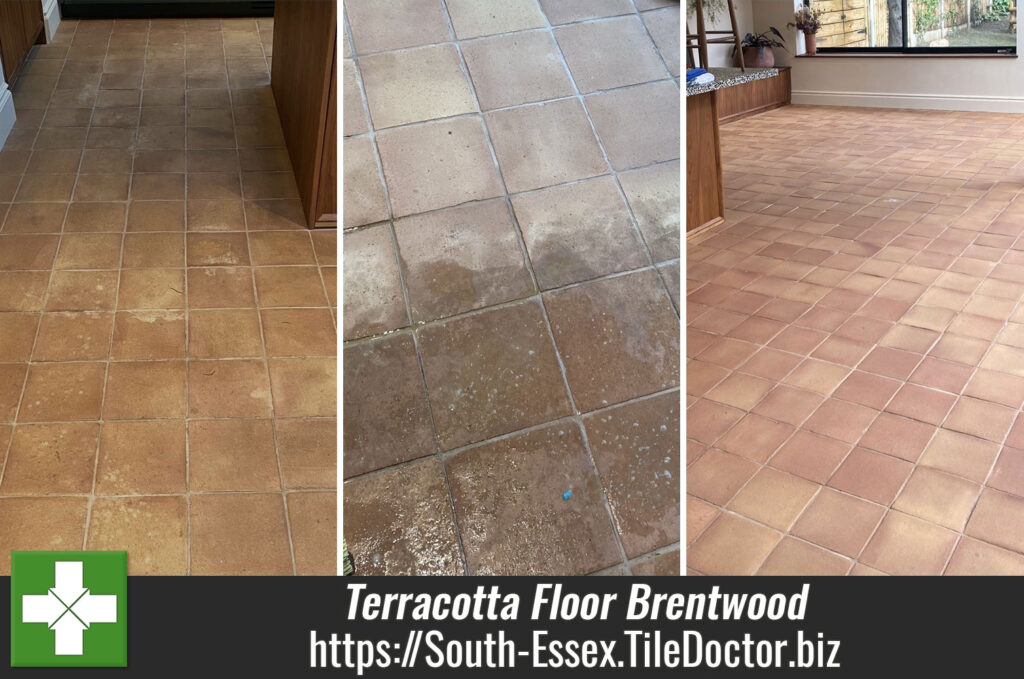
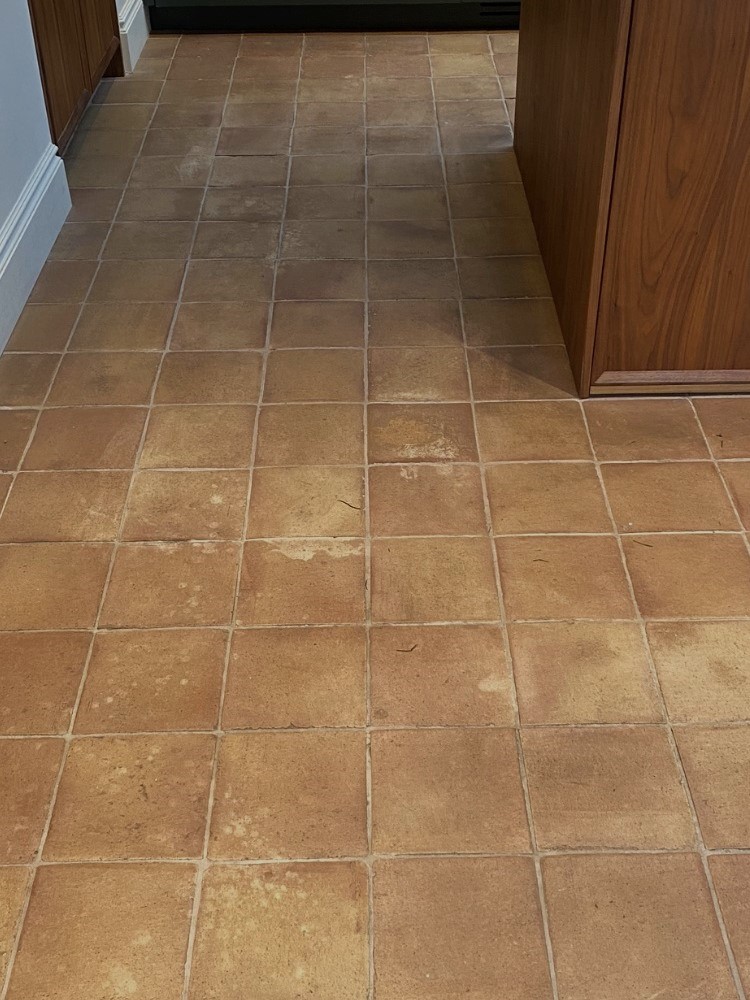
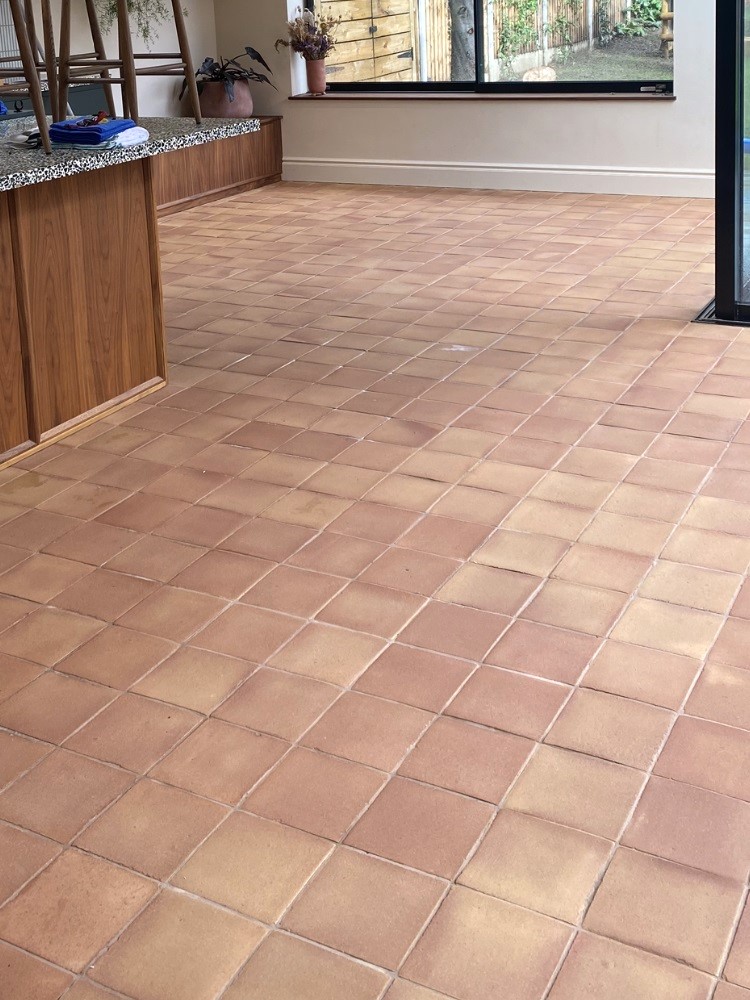
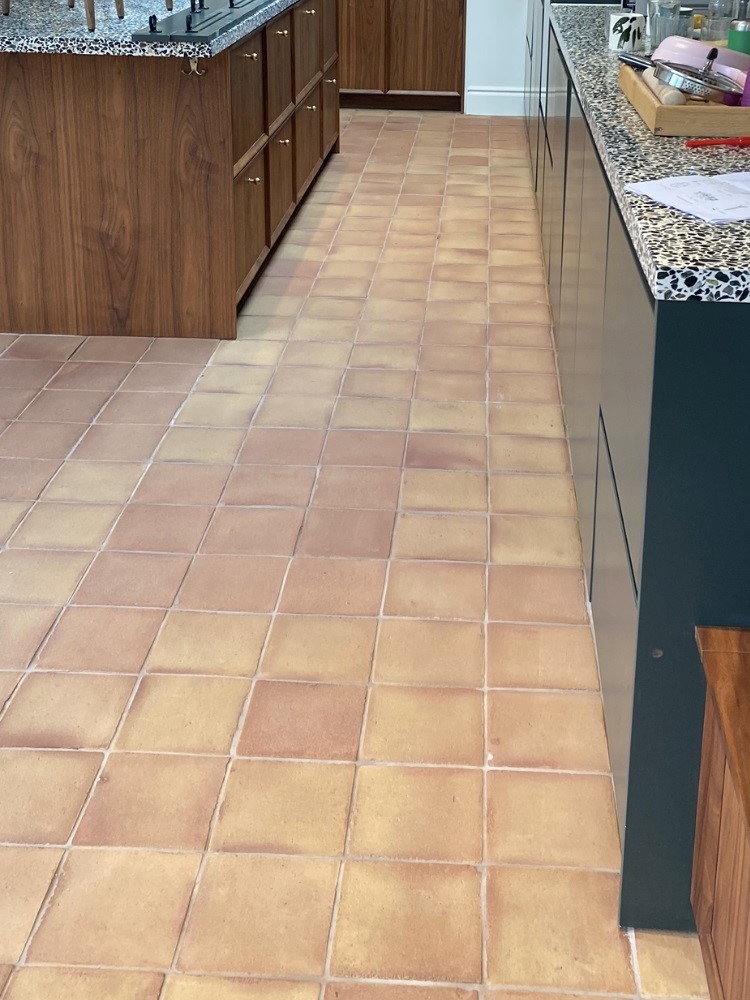
Terracotta Floor Renovation Brentwood

Sticky Linseed Oil Removed from a Terracotta Kitchen Floor in Brentwood

This is a Terracotta tiled floor at a property in Brentwood that had been recently installed. Unfortunately, the tilers decided to seal the terracotta with a linseed-based sealer that hadn’t gone off and was still tacky to the touch causing it to trap dirt. I suspect they simply put too much down; however, I was surprised they used linseed as this is a very old-fashioned method of sealing terracotta when modern sealers offer far better performance.

Terracotta Floor Before Cleaning Brentwood

The solution I offered was to strip the linseed off the floor, give the tiles a good clean and then re-seal with a modern based sealer designed for the job. Happy with my quote and relieved the problem could be resolved, we agreed a date to complete the work.

Cleaning a Terracotta Tiled Kitchen

To strip off the Linseed Oil I applied a strong dilution of Tile Doctor Remove and Go which is a powerful alkaline coatings remover. It was left to work breaking down the linseed for about ten minutes and then scrubbed in using a rotary machine fitted with a black 17″ pad. The soiling was then rinsed away with water extracted using a wet vacuum. This process had to be repeated several times before the floor was clear and I used several pads in the process.

The grout was then hand scrubbed using Tile Doctor Pro-Clean, these were small terracotta tiles so there was a lot of grouting to cover. Afterwards the soiling was rinsed off and extracted as before using the wet vacuum.

The last step in the cleaning process was to give the floor an acid rinse using a dilution of Tile Doctor Grout Clean-Up. It was scrubbed in with a deck brush to remove excess grout smears and neutralise the pH level of the floor following the use of alkaline cleaners. Once done it was rinsed away and extracted as before.

Terracotta Floor During Cleaning Brentwood

Sealing a Terracotta Tiled Kitchen

I left the floor to dry out for a couple of days, before returning to apply a new sealer which for this floor we had chosen Tile Doctor Colour Grow. This is an impregnating sealer that soaks into the pores of the tile preventing dirt from becoming lodged there and thereby protecting it from within. Colour Grow as its name suggests includes a colour enhancing formula that improves the lovely orange/red colours so ideal for Terracotta.

Made from clay, Terracotta is a porous material and so does need quite a few coats before its fully sealed. For this floor I needed to apply give coats of Colour Grow, allowing for each coat to dry before applying the next. This is a low sheen sealer which will give the floor a much more hardwearing surface and it really brought out the natural colours in the Terracotta.

Terracotta Floor After Renovation Brentwood

My client was very happy with the difference and left the following 5-star review.

“Matthew was a pleasure to work with and did a fantastic job on a tricky terracotta renovation.”

For aftercare I recommended the use of Tile Doctor Neutral Tile Cleaner, which is a pH neutral tile cleaner, it’s a gentle yet effective product that won’t impact the sealer.

Terracotta Floor After Renovation Brentwood


Professional Restoration of a Terracotta Tiled Kitchen Floor in Essex

Sticky Linseed Oil Removed from a Terracotta Kitchen Floor in Brentwood Read More »
Travertine Kitchen Floor Renovation Gidea Park Romford

Dirty Travertine Kitchen Floor Tiles Renovated in Gidea Park Romford

These photographs are of a Travertine kitchen floor at a property in Gidea Park near Romford. The floor was approximately 20m2 and had been laid 20 years ago. Although it had been sealed the client had been cleaning the floor with the wrong products and that had stripped the sealer off the floor. As a result, dirt had become ingrained into the pores of the stone making it look very dirty.

Travertine Kitchen Floor Before Cleaning Gidea Park Romford Travertine Kitchen Floor Before Cleaning Gidea Park Romford

My client was so unhappy with its appearance they were seriously considering taking the Travertine tiles up and replacing it with something more manageable, as they could never get it to look clean. You can imagine their relief after I visited and advised them that the floor could indeed be recovered.

After surveying the stone floor, I worked out a plan for its renovation and provided them with a quote which they were happy to go ahead with.

Cleaning a Travertine Tiled Kitchen

I started the cleaning with the grout lines which had darkened with accumulated dirt. To do this I applied a 4:1 dilution of Tile Doctor Pro-Clean along the grout lines and left it to soak in for ten minutes. The grout lines where then scrubbed by hand until their original colour returned. Although harder work, I find this method works better than using pads with a machine as the pads can struggle to reach into the recesses of the grout lines.

To get the ingrained dirt out of the stone and restore the beautiful appearance of the Travertine I used a set of Tile Doctor Burnishing pads. These are applied with a rotary buffing machine starting with the coarse 400-grit pad and worked into the stone with more Tile Doctor Pro-Clean.

Travertine Kitchen Floor During Cleaning Gidea Park Romford

After rinsing and extracting I then moved onto the 800 and 1500-grit pads, using only water this time for lubrication and rinsing and extracting after each pad. The last 3000-grit pad was applied with a little water sprayed onto the tiles to bring up a polish on the stone.

Sealing a Travertine Tiled Kitchen Floor

The floor was left to dry overnight, and I returned the next day to seal it using two coats of Tile Doctor Ultra-Seal sealer to give it a nice sheen. This will give the floor hardwearing protection by ensuring dirt remains on the surface where it is much easier to remove with regular cleaning.

Travertine Kitchen Floor After Renovation Gidea Park Romford Travertine Kitchen Floor After Renovation Gidea Park Romford

My client was very happy with her new floor and relieved that the new sealer would make it much easier to keep clean going forward. She also left a 5-star review and commented:

“GOOD JOB….PLEASED”

On the topic of cleaning, I recommended Tile Doctor Neutral Tile Cleaner which is a pH neutral cleaner. It will not strip the sealer like the previous products she had been using and should ensure the floor is kept in this condition for many years to come. Obviously, we are on hand in the future if she has any further problems.


Source: Travertine Kitchen Tile Cleaning and Renovation Service in Gidea Park South Essex

Dirty Travertine Kitchen Floor Tiles Renovated in Gidea Park Romford Read More »
Multicoloured Slate Floor Renovation Stock Essex

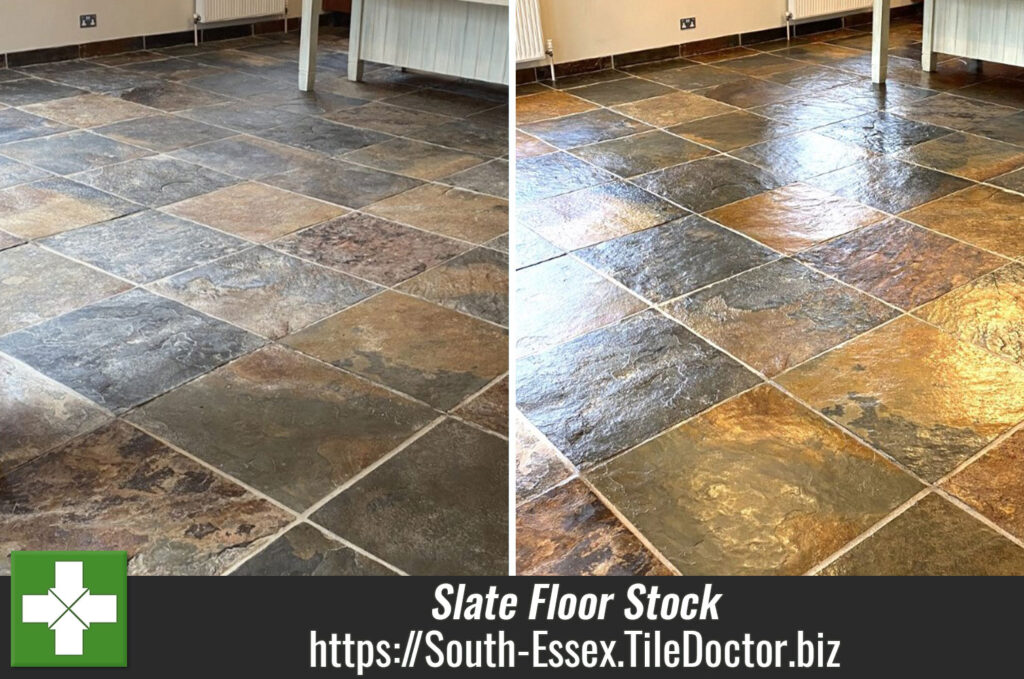
New Sealer adds Life to a Dull Multi Coloured Slate Floor in Stock

This multi-coloured Slate kitchen floor had been laid fifteen years prior and although in very good condition the owner was unhappy with the finish. Basically, it looked dull, un-inviting and the owner wanted some life putting back in the stone.

It was clear to me that the sealer that had provided previously provided the sheen finish had simply worn off with use. Without a sealer in place dirt was now becoming ingrained into the pores of the slate making the problem worse.

Multicoloured Slate Floor Before Cleaning Stock Essex

I visited the property to survey the tiles and provide a quote for renovating the floor. The work would take two days and would include removing what remained of the old sealer, deep cleaning the Slate and then re-sealing the tiles with a sheen finish sealer. The quote was accepted, and a date arranged to do the work.

Cleaning a Multi-Coloured Slate Tiled Floor

I started by applying a strong dilution of Tile Doctor Remove and Go and let it soak into the stone for ten minutes. This product is a coatings remover and cleaner that is safe to use on all type of stone or tile. Then using a 200-grit milling pad fitted to a rotary floor buffer the solution was worked into the stone to strip off what remained of the remaining sealer and pull the dirt out of the stone. The floor was then rinsed, and the soiled solution was removed using a wet vacuum.

Next, I treated the floor to an acid wash using another Tile Doctor product called Grout Clean-up. This is great for removing grout smears left over from tiling and neutralises the pH level of the floor after the use of Remove and Go which is alkaline. After scrubbing in the solution with a deck brush the floor was then rinsed and extracted again with the wet vacuum.

Sealing a Multi Coloured Slate Tiled Floor

I left the floor to dry out overnight and returned the next days later to apply the sealer. Before doing so I checked the moisture level of the tiles with a damp meter to ensure they had dried sufficiently. This is always worth doing as applying sealer to a floor that is still damp can lead to an inconsistent finish.

All was well with the readings so I started applying the first coat of sealer which for this floor we used Tile Doctor Seal & Go. This product will protect the stone from ingrained dirt and adds a lovely subtle shine to the floor which matched the customers’ requirements exactly. After about forty minutes of drying time, I applied a second cost and as expected this resulted in a healthy sheen.

Multicoloured Slate Floor After Cleaning Stock Essex

My client was very happy with the result and left 5-star feedback along with the following comment.

Very Professional

For the aftercare cleaning of sealed slate floors, I recommend the use of Tile Doctor Neutral Tile Cleaner which is a gentle but effective product that won’t upset the sealer like many of the bleach based products you find in supermarkets.


Professional Restoration of a Multi Coloured Slate Tiled Kitchen, Hallway and WC Floor in North Lincolnshire

New Sealer adds Life to a Dull Multi Coloured Slate Floor in Stock Read More »

Scroll to Top