
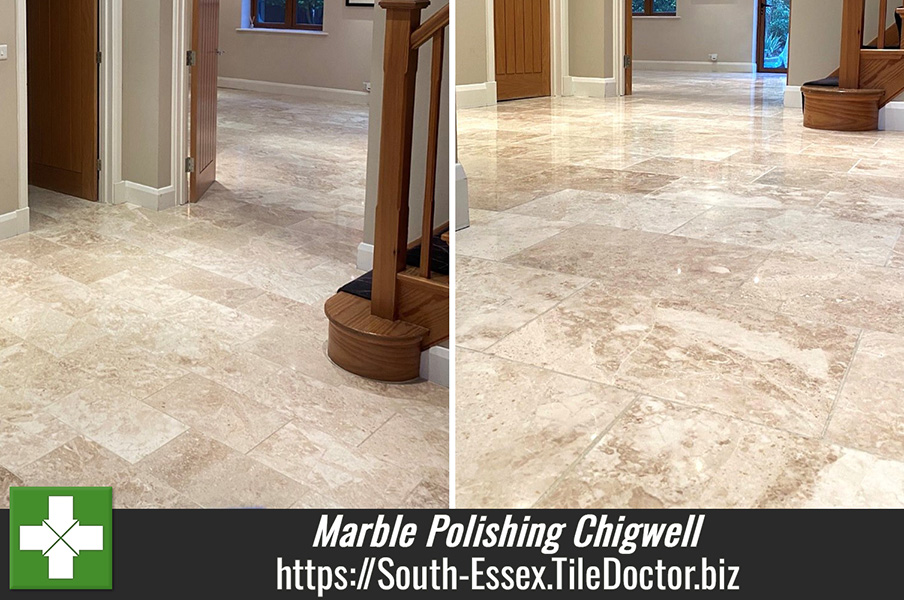
Sparkle Returned to Dull Marble Floor in Chigwell Essex
This premium Marble Tiled floor was installed at a property in Chigwell around fifteen years ago and had only ever been mopped clean, never polished. The floor had long since lost its sparkle and the owner wanted to know if anything could be done to bring back the deep shine it once had.
 |
 |
Polished stone floors like this example will become dull with use if the polish isn’t maintained so it’s quite a common issue. The solution is to maintain the polished appearance using a very fine burnishing pad which is encrusted with diamonds that hone the stone and return the deep polish. We do offer this as a maintenance service however in this case the sealer had also worn off and so it would be necessary to deep clean the Marble first, rebuild the polish and then re-seal.
Having visited the property to understand all the issues and measure up I was able to email over a detailed quotation for completing the work and products needed. Happy with the quote and keen to have the Sparkle restored the quote was accepted and a date set for the work to start which would take two days.
Deep Cleaning Polished Marble Flooring
To restore the deep polish and deep clean the stone a series of Tile Doctor Diamond Burnishing Pads were run over the tiles in sequence from coarse to extra fine. The coarse 400-grit pad opens up the pores in the stone and flushes out ingrained dirt and residues. Water is used to lubricate the process, and this turns into a dark slurry as the work progresses. Once each tile has been burnished several times with the coarse pad, the floor is rinsed with more water and the slurry extracted with a wet vacuum.
The coarse pad is then swapped for the 800-grit pad which is the first of three finer pads that gradually close the pores in the stone and rebuild the deep polish. Again, these are applied with water and the floor rinsed and extracted afterwards to remove the slurry.
Next step was to deep clean the grout lines using Tile Doctor Pro-Clean diluted with 4 parts water and scrubbed in using a stiff grout brush. The pads also help clean the grout but can struggle to reach into the recesses of the grout line so I find doing this step by hand is the most effective way to get the grout clean.
After another rinse and extraction to remove soiling from the grout cleaning work moved onto the final step in the stone polishing process by applying the very fine 3500-grit burnishing pad. This pad is applied dry with only a little water using a process we call a spray burnish leaving the marble smooth with a deep light-reflecting finish.
Sealing a Marble Tiled Kitchen
The floor was left to fully dry out overnight and on the second day the marble was finished with the application of Tile Doctor Colour Grow sealer. This is Tile Doctor’s impregnating colour enhancing sealer that penetrates deep into the stone protecting it from within. The sealer brings out the colour in the stone whilst adding long-lasting protection from spills, stains, and moisture.
 |
 |
Once complete the Marble and Grout looked so much cleaner and I’m pleased to say the sparkle had returned. The floor now looked like a new installation again and my customer was very happy with the transformation.
For aftercare I recommended Tile Doctor Stone Soap which is a gentle yet effective cleaning product that contains a patina enhancer and won’t impact the sealer.
Professional Restoration of a Marble Tiled Kitchen in South Essex
Sparkle Returned to Dull Marble Floor in Chigwell Essex Read More »


